Quick Start Guide
Get Scrapalot Desktop up and running in under 15 minutes! This guide walks you through setting up the open-source desktop application locally.
Choose Your Path
What You'll Have
By the end of this guide:
Fully functional Scrapalot Desktop
Running locally on your machine
Upload & chat with documents
PDF, EPUB, and text formats
AI-powered answers
With source citations
Web interface
At http://localhost:3000
Cloud or local AI models
Your choice
Your data stays local
On your machine
Prerequisites
| Requirement | Version | Check Command | Purpose |
|---|---|---|---|
| Node.js | 18+ | node --version | Frontend |
| Python | 3.12+ | python --version | Backend |
| PostgreSQL | 16+ | psql --version | Database |
| Git | Any | git --version | Clone repos |
Optional but Recommended
- Docker - Easiest way to run PostgreSQL + pgvector
- AI API Key - OpenAI, Anthropic, or use Ollama (local, free)
Quick Start (4 Steps)
Step 1: Download Scrapalot Desktop
Download the latest release from our website or GitHub:
# Option 1: Download from website
# Visit https://scrapalot.app/download

# Option 2: Clone from GitHub (when available)
# Desktop app repository will be announced soon
# UI and connector development kit are open sourceOpen Source Components
- Desktop App Core - Full RAG capabilities (coming soon)
- UI Components - React frontend (open source)
- Connector Development Kit - Build custom connectors (open source)
- Documentation - This site is public, code is for reference only
Step 2: Database Setup (Docker - Easiest)
Using Docker (Recommended):
# PostgreSQL 16+ with pgvector
docker run -d \
  --name scrapalot-db \
  -e POSTGRES_PASSWORD=your_password \
  -e POSTGRES_DB=scrapalot \
  -p 5432:5432 \
  pgvector/pgvector:pg16

# Verify it's running
docker psAlternative: Manual PostgreSQL Install
Ubuntu/Debian:
sudo apt-get install postgresql-16 postgresql-16-pgvector
sudo -u postgres createdb scrapalot
sudo -u postgres psql -d scrapalot -c "CREATE EXTENSION vector;"macOS:
brew install postgresql@15 pgvector
createdb scrapalot
psql scrapalot -c "CREATE EXTENSION vector;"Windows: Download PostgreSQL 16+ from postgresql.org and install pgvector extension.
Step 3: Install & Configure
Desktop App Coming Soon
The desktop application is currently in development. Installation instructions will be updated when the release is available.
For now, you can sign up for the free Researcher Plan on our cloud platform at scrapalot.app to start using Scrapalot immediately.
When the desktop app is released:
# Install desktop app (instructions will be provided)
# Configure database connection
# Set up AI provider (OpenAI, Anthropic, Google, or local Ollama)AI Model Options
- Cloud providers: OpenAI, Anthropic, Google (API key required)
- Local models: Ollama (free, runs on your machine)
- Cost-effective: DeepSeek (10x cheaper than OpenAI)
Step 4: Launch Scrapalot
Once the desktop app is installed:
# Launch the application
# Desktop app will start on http://localhost:3000🎉 Open your browser to http://localhost:3000
You'll see the Scrapalot login/signup page!
First Steps in Scrapalot
1. Create Your Account
- Click "Sign Up" on the homepage
- Enter your email and password
- Click "Create Account"
- You'll be automatically logged in
2. Upload Your First Document
- Click the Upload button (top right)
- Select a PDF, Word doc, or text file
- Wait 10-30 seconds for processing
- You'll see a notification when it's ready
Supported Formats:
- PDF (
.pdf) - EPUB (
.epub) - Word (
.docx,.doc) - Text (
.txt) - Markdown (
.md) - CSV (
.csv)
3. Ask Your First Question
- Click on your uploaded document
- Type a question in the chat box
- Press Enter or click Send
- Get an AI-powered answer with sources!
Example Questions:
- "What is this document about?"
- "Summarize the main points"
- "What does it say about [specific topic]?"
- "List all the key findings"
Configuration Options
Using Local Models (Ollama)
Install Ollama:
# Install Ollama
curl -fsSL https://ollama.com/install.sh | sh

# Pull a model
ollama pull nemotron-3-nano:30b

# Start Ollama (runs on http://localhost:11434 by default)
ollama serveConfigure in Scrapalot UI:
- Open Settings → AI Providers tab (Remote AI Providers)
- Click + Add Provider button
- Select Ollama from the provider list
- The endpoint will be auto-filled with
http://localhost:11434 - Click Test Connection to verify Ollama is running
- Click Fetch Models to see all your pulled Ollama models
- Select the models you want to use and click Add Provider
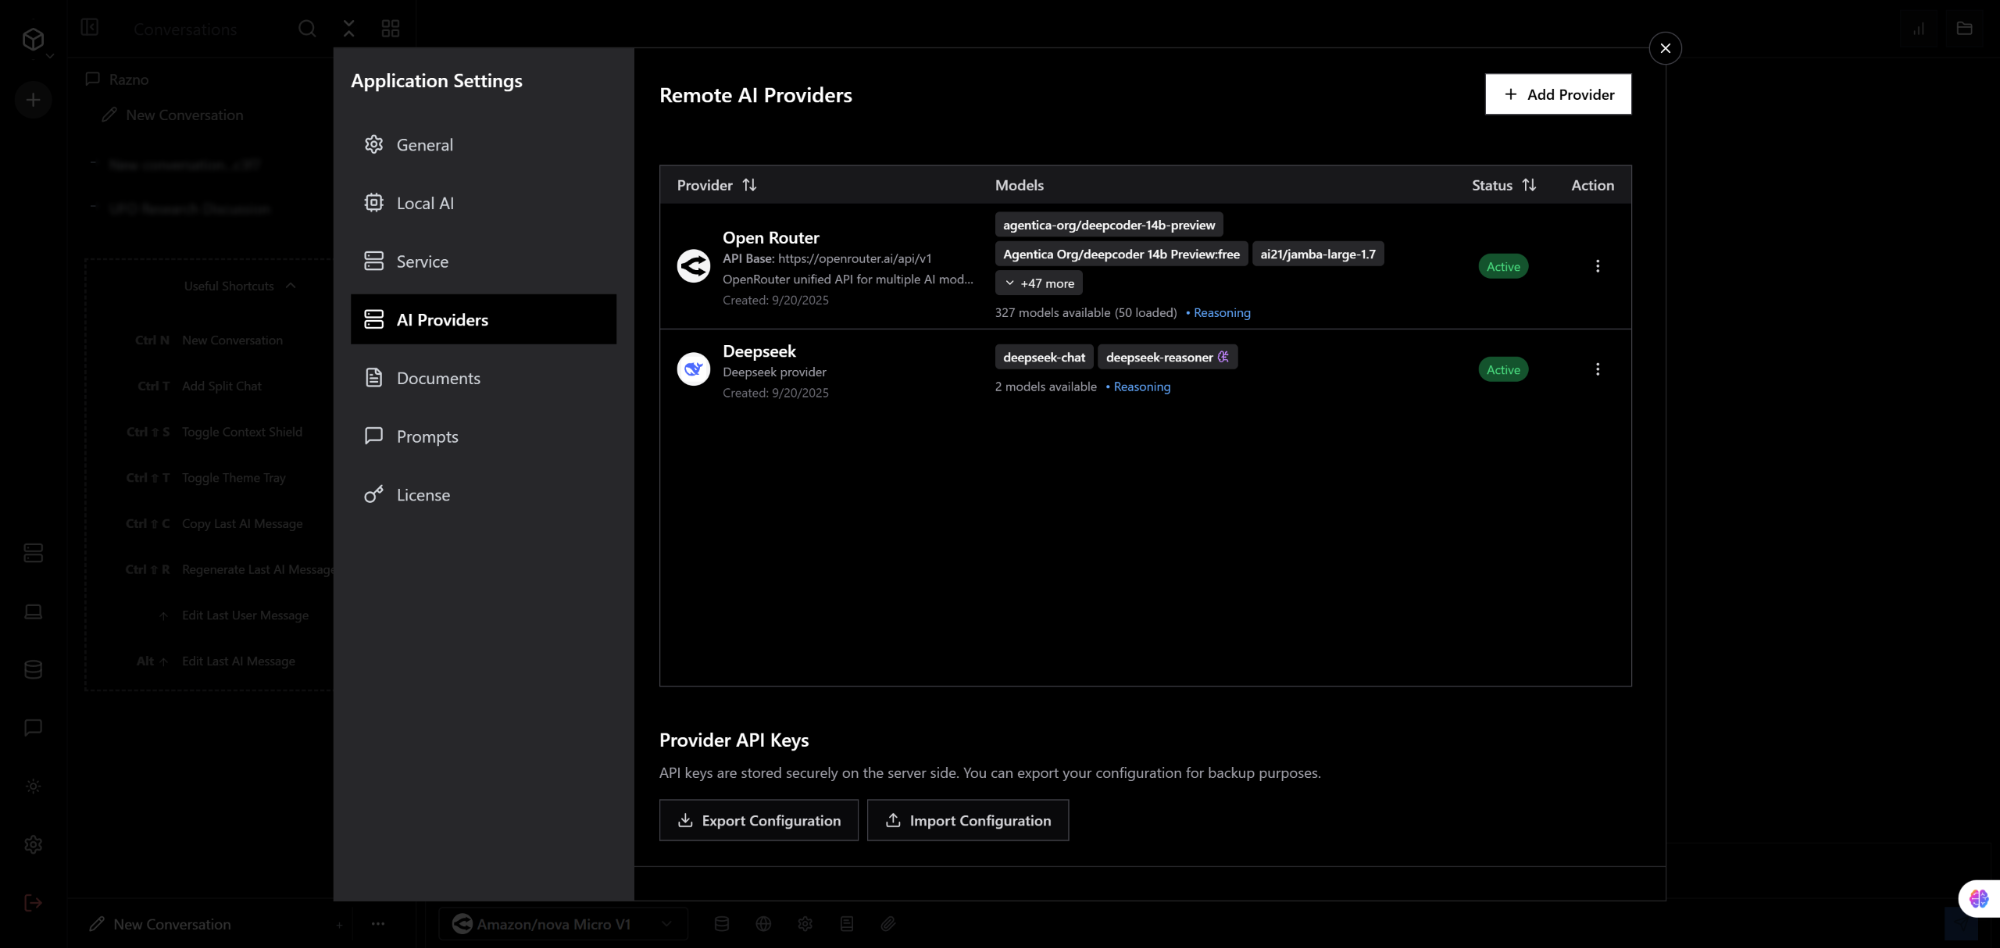 AI Providers tab showing Ollama, vLLM, and LM Studio configuration
No API keys needed - your models run completely offline on your machine!
Other Local Model Providers
You can also use vLLM and LM Studio the same way:
- vLLM: High-performance inference server (requires custom endpoint URL)
- LM Studio: User-friendly desktop app (default:
http://localhost:1234/v1)
All three are configured in the AI Providers tab, not the Local AI tab (which is for server-side GGUF models).
Advanced Settings
Scrapalot includes many other configuration options accessible through the Settings UI:
- General Settings - Theme, language, font preferences
- Documents - Chunking strategies, embedding models
- Prompts - Custom prompt templates
- Workspaces - Team collaboration settings
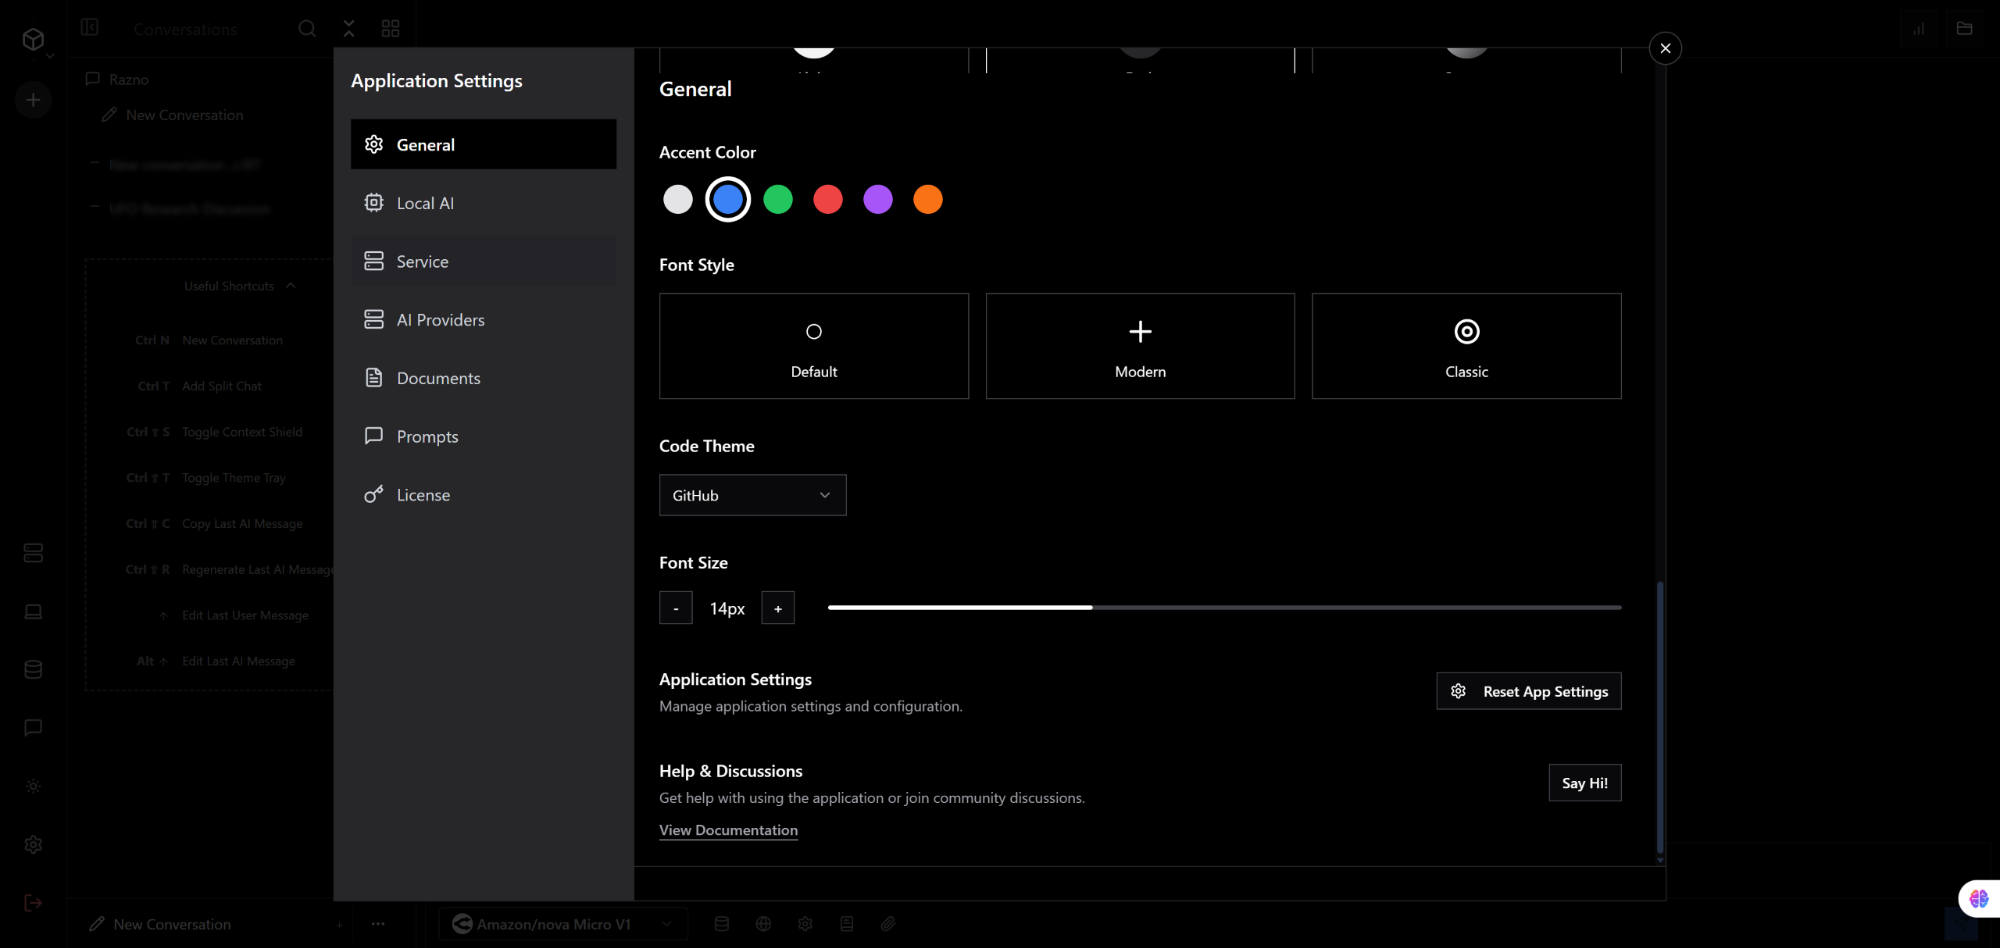 General settings for theme and appearance customization
Verify Installation
Check that everything is working:
# Backend health check
curl http://localhost:8090/health

# Should return:
# {"status":"healthy"}

# Frontend should be accessible at:
# http://localhost:3000Troubleshooting
Backend Won't Start
Error: "Connection to database failed"
# Check if PostgreSQL is running
docker ps  # if using Docker
# or
sudo systemctl status postgresql  # if local

# Check connection settings in .env
# Make sure POSTGRES_HOST, POSTGRES_PORT match your setupError: "ModuleNotFoundError"
# Reinstall dependencies
pip install -r requirements.txt --force-reinstallFrontend Won't Start
Error: "EADDRINUSE: address already in use"
# Port 3000 is already in use, use a different port:
npm run dev -- --port 3001Error: "Cannot connect to backend"
# Make sure backend is running on port 8090
curl http://localhost:8090/health

# Check VITE_API_URL in frontend
# Should be http://localhost:8090Database Issues
Error: "relation does not exist"
# Run migrations
cd scrapalot-chat
python -m alembic upgrade headError: "PGVector extension not found"
# Install PGVector extension
# Connect to your database
psql -U scrapalot -d scrapalot

# Run:
CREATE EXTENSION IF NOT EXISTS vector;
\qUpload Not Working
Documents stuck in "Processing"
# Check backend logs for errors
# Make sure you have enough disk space
# Try a smaller document first (< 5MB)Next Steps
Now that you have Scrapalot running:
Learn More
- User Guide - Detailed feature walkthrough
- Architecture - How Scrapalot works
- API Reference - REST API documentation
Advanced Features
- External Connectors - Connect Google Drive, Dropbox, academic databases
- Model Management - Configure AI models
- Connector Development - Build custom connectors (SDK available)
Deployment
- Production Deployment - Deploy to production
- Cloud Infrastructure - Deploy to cloud providers
- Docker Deployment - Containerized deployment
Tips for Success
Performance Tips
- Use SSD storage for faster document processing
- Allocate 4GB+ RAM for optimal performance
- Use local models for privacy and cost savings
- Enable caching for frequently accessed documents
Best Practices
- Organize documents into collections by topic
- Use descriptive names for easy searching
- Ask specific questions for better answers
- Review sources to verify information
- Share collections with your team
Security Tips
- Change default passwords in
.env - Use strong passwords for user accounts
- Enable HTTPS in production
- Keep API keys secure (never commit to git)
- Regular backups of your database
Getting Help
Community Support
- GitHub Issues: Report bugs
- GitHub Discussions: Ask questions
- Discord: Join our community (link in README)
- Email: support@scrapalot.com
Documentation
- FAQ - Common questions answered
- Troubleshooting Guide - Fix common issues
- Video Tutorials - Watch and learn
You're Ready!
Congratulations! You now have Scrapalot running. Start uploading documents and asking questions!
Try Scrapalot Now
Desktop App: Coming soon - sign up for updates at scrapalot.app
Cloud (Free Researcher Plan): Start immediately at scrapalot.app
Need Team Features? Check out our Professional and Enterprise plans.